LED Light Therapy Face & Neck Mask ManualUpdated 5 months ago
Device Setup
- Connect all the straps to the device.
- Connect the wires to the controller.
- Press and hold the top button on the controller to switch the device on.
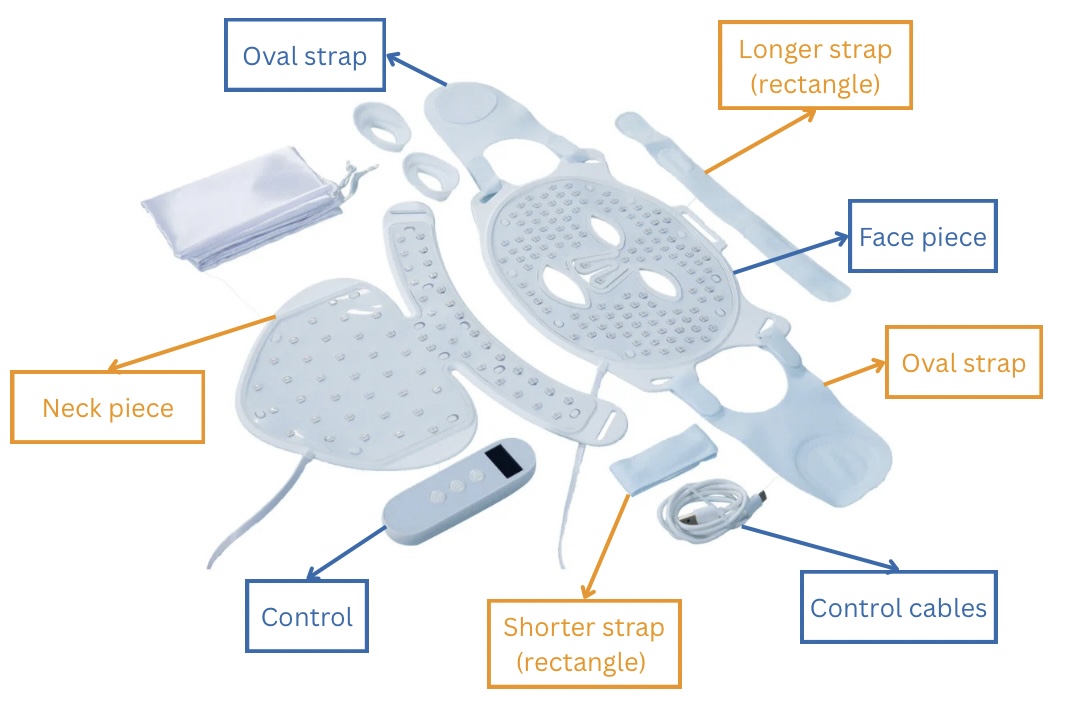
How to Set Up the Device with the Straps
- Place the device flat on a table with the lights facing upwards towards you.
- The shorter rectangular strap is used for the neck piece.
- The oval straps are used on the sides of the face piece.
- Ensure the raised-circle side faces downwards.
- The longer rectangular strap is used for the face piece as the top strap that goes over your head.
Putting the Face Device On
- Hold the face device up to your face with the lights facing your skin.
- Take the oval straps and place them one on top of the other behind your head.
- Take the long rectangular strap, place it over your head, and secure it down over the oval straps.
Control Panel Overview
The control panel has 3 buttons, arranged from top to bottom
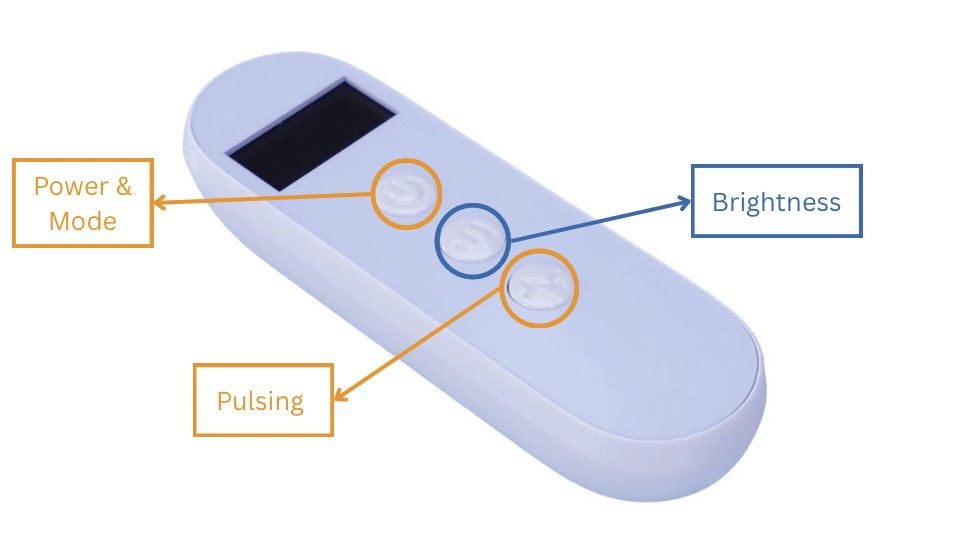
Button Functions (Top to Bottom)
Ensure the controller is connected to the device before use.
Top Button: Power & Mode Selection
- Press and hold to turn the device on.
- Press to cycle through treatment modes. The selected mode will display on the black screen.
Available modes:
- Repairing – Red light only
- Rejuvenation – Red and Yellow light
- Anti-aging – Red and Near-Infrared light
- Morning Skincare – Red, Near-Infrared, and Yellow lights
- Anti-acne – Blue light
- Bedtime Skincare –
- First 2 minutes: Yellow light only
- Next 5 minutes: Red and Near-Infrared lights
- Final 3 minutes: Blue light
Middle Button: Brightness
- Press to adjust light intensity.
- 3 brightness levels available.
Bottom Button: Pulsing Function
- Press once to activate pulsing.
- Press again to cancel pulsing.